![]()
DIY softbox, reflector and lightbox
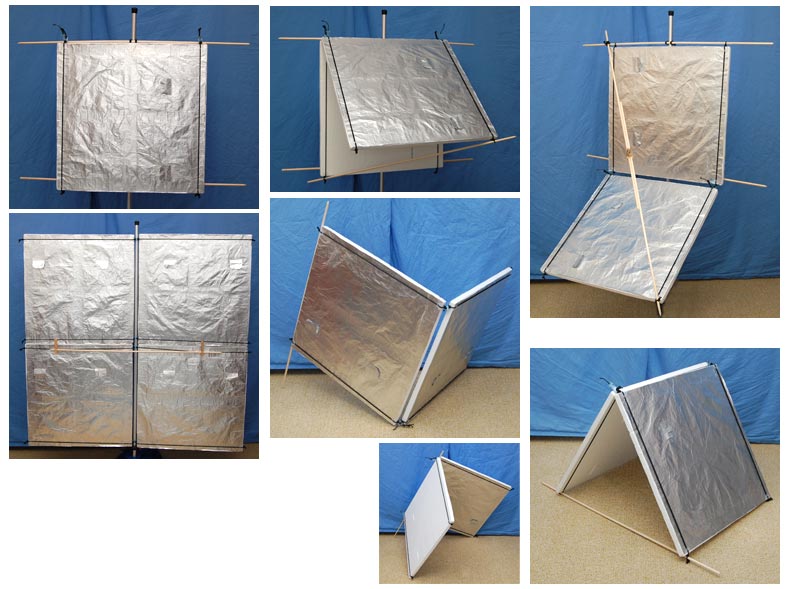
Softbox function
- can stand on its own, horizontal or tilted forwards.
- can also
be fastened to any "household shaft" (no need for a light
stand)
- softbox opening can be resized from a narrow 30x55(115)cm
to a wide 80x55(115)cm
- the flash or bulb can be fastened in front or
back.

Example of sizes.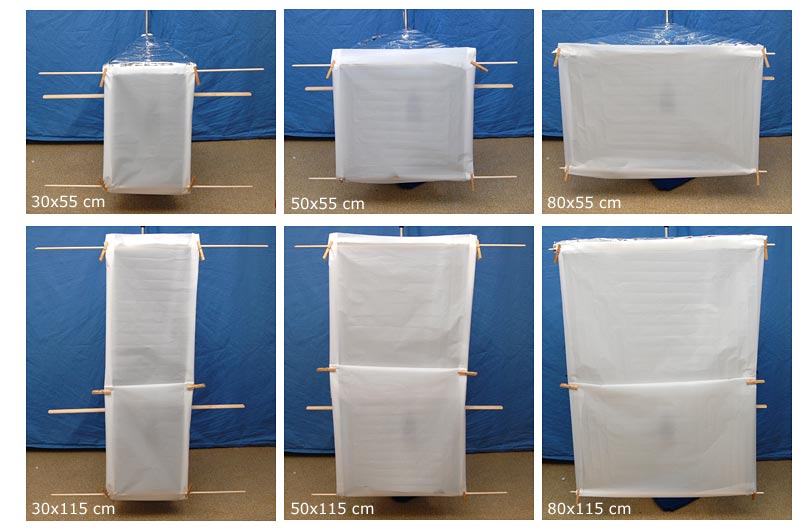
Example of ways to fasten the flash or bulbs, the flat wood piece
also makes it easy to fasten multiple flashes or bulbs.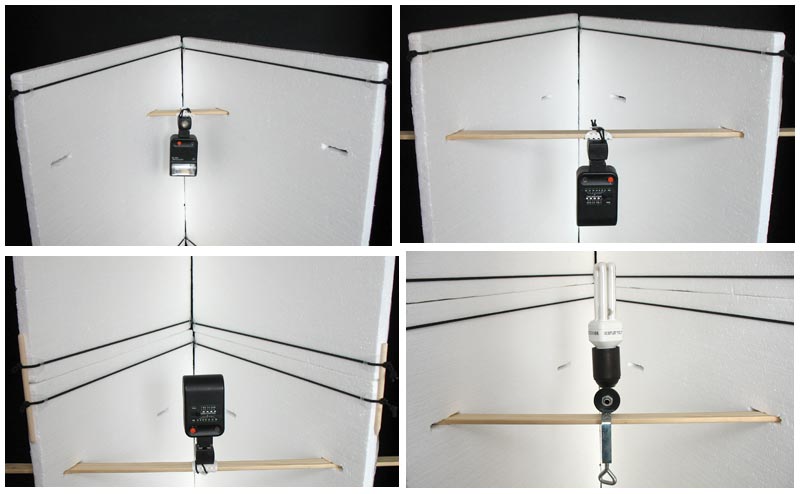
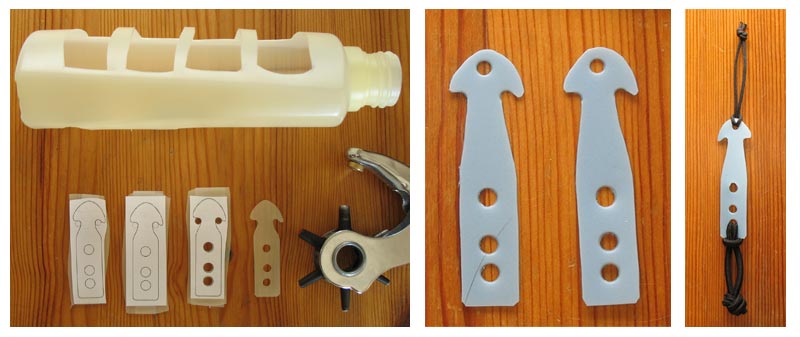
Parts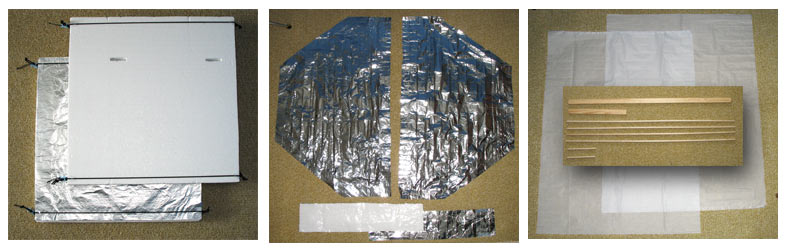
Details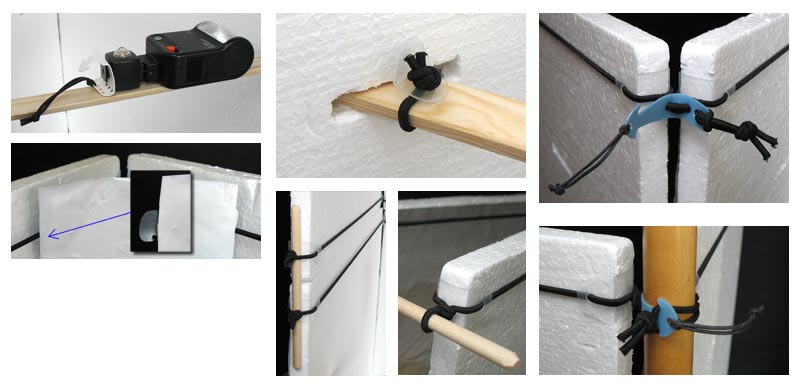
Reflector function
- silver or white reflector, examples
of use below, can stand for it self or be fastened to a shaft,
reflector
size from 60x60 cm to 120x120 cm.
Lightbox function
- works well with an adjustable mirror
in front of the camera flash,
the background
can be fastened to the shock cord as shown .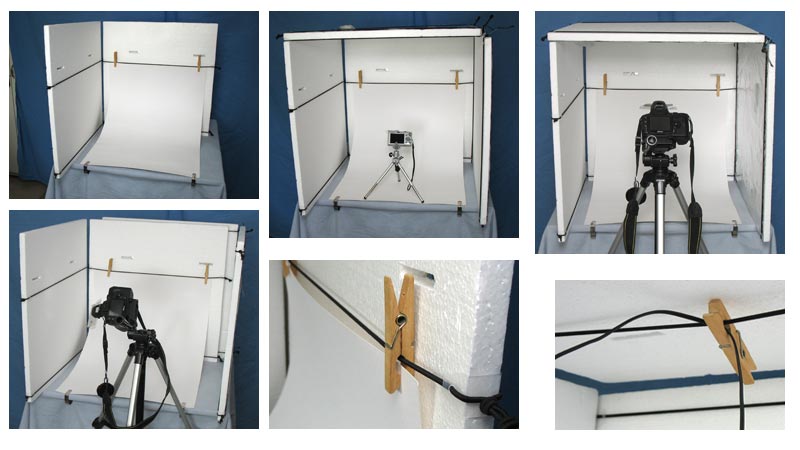
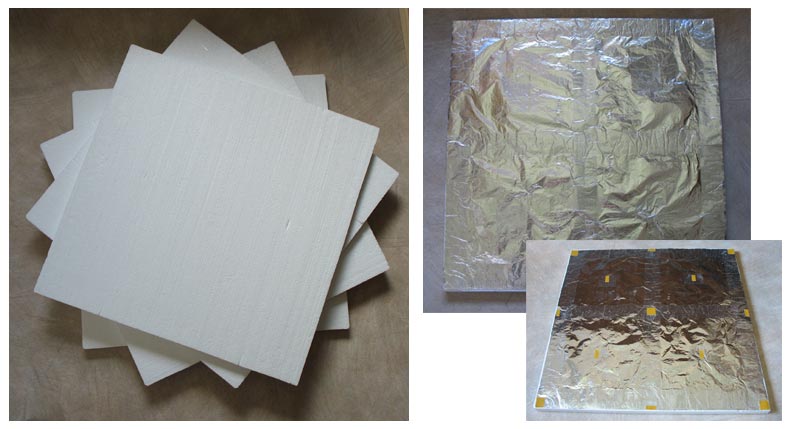
Materials:
- 2 white styrofoam/polystyrene sheets ( 120
x 60 x 2 cm )
- aluminium foil
- clear packing tape + double
adhesive tape
- white shock cord, 3-4 mm x 10 meter + 3 meter
of 4 mm black shock cord
- 4 round wood sticks, 8 mm x 90 cm
-
1 (or two) flat piece of wood, 35-45 mm x 10 mm x 90 cm
- white
nylon fabric, 130 x 90 cm
- rescue blanket (silver colour)
-
plastic pieces from a plastic box and a schampoo bottle
How to make it :
1. Cut the styrofoam sheets into 4
squares (60 x 60 cm)
2. tape aluminium foil on one side (use
the matte side, the shiny side will have uneven reflections with
"hotspots"),
and reinforce
the edges with clear tape on the backside, fasten with a few pieces
of double adhesive tape .
3.
Cut out the edge protectors (these are necessary to prevent the
cord from cutting into the sheets) and
cold
bend them over a sharp edge (a steel ruler or similar).
The
material I have used is from a thin plastic box, cutting templates
are here: www.benvelo.com/muttafino_1.pdf
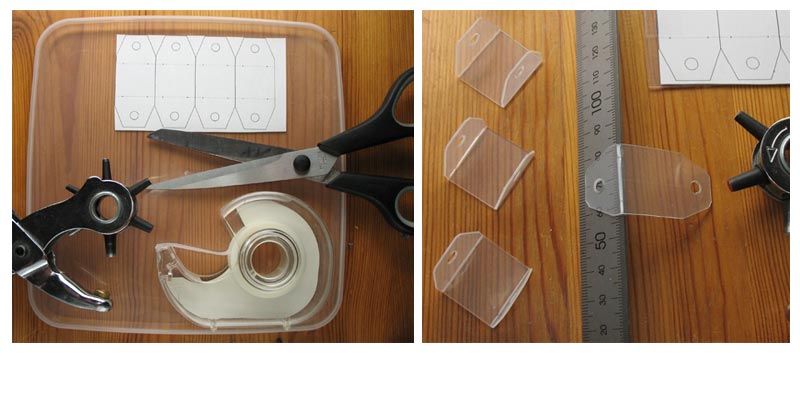
4.
Cut out the "shaft holders" (material from a schampoo
bottle, use one that feels stiffer/thicker) and
fasten
a short elastic loop at one end and a thin cord at the other end.
(the
left image shows the first prototype)
5. Cut the white shock cord into four 250 cm lengths (do
not use coloured cords as they can be seen in reflections)
fold
the cord in middle,
- make the first knot about 10mm from the
end and tighten hard, slide on two edge protectors as shown (fig.
1)
Important! each knot must be tightened hard before
making the next one.
- the second knot should be around 40-50
cm from the first (depending on cord hardness),
slide
on the "shaft holder" as shown in fig. 2.
- place the
third knot about 15 mm from the second one as shown in fig. 3 and
slide on the next two edge protectors,
- knot number four should
be placed at the same distance as between number one and two (40-50
cm) and the
fifth knot about 10 mm from the forth,
cut off the ends and melt them with a lighter.

6. assemble the sheets as shown below and make the holes (where
depends on how high your flash is, the flash head
should
be in the middle ( I placed the holes 5 cm from the front and 14
cm's from the back)
the holes should have the
same height as the rectangular wood piece and be about 3 cm wider.
(use
a new blade when cutting the holes and lube the blade with a drop
of "food oil" between each cut)
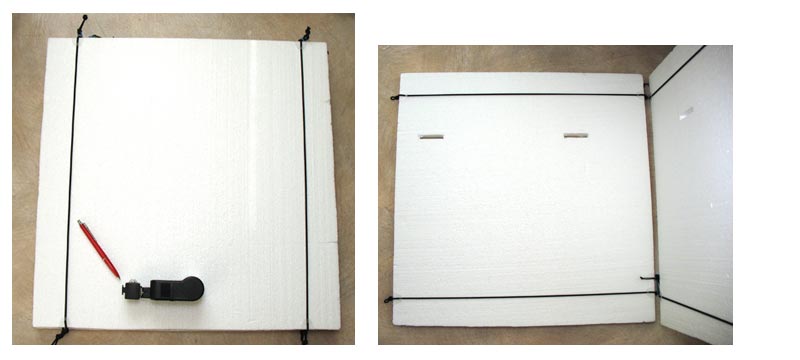
7. Make the top, bottom and back covers ( see measurements here: www.benvelo.com/muttafino_2.pdf
),
tape the mini "hooks" to the
back cover .
8. make the wood sticks and parts + the two stoppers
9. NoBall bungee ( DIY ball bungee ) can be made like
this.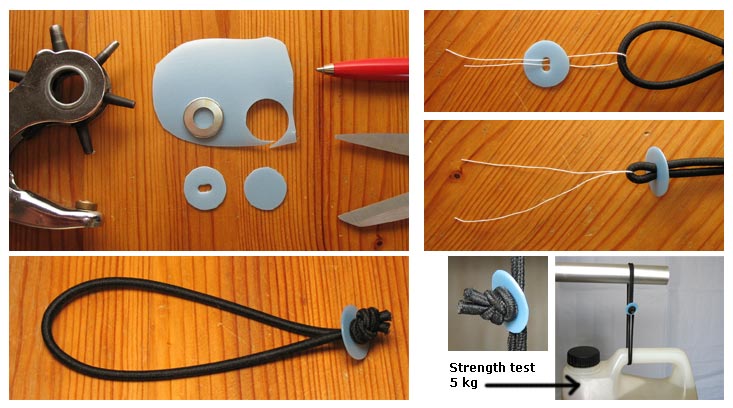
The softbox was made for the "Build a softbox contest" at http://www.diyphotography.net
Copyright Benny Johansson